Energy Makeover of an Old House
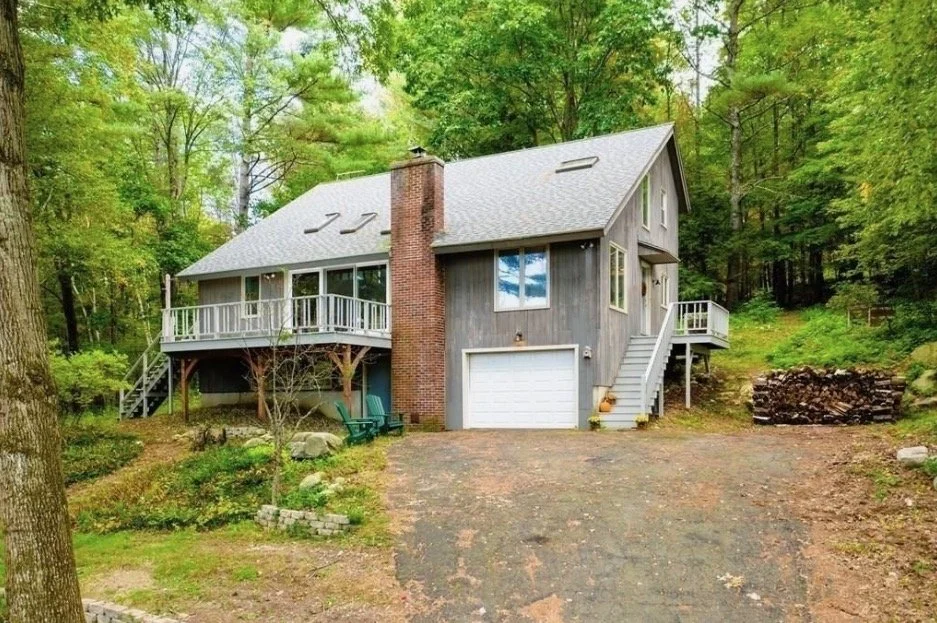
On March 29, 2022 our daughter Zahava bought an all-electric house built in 1973. The first thing she did was to sign up for community solar, so that right away she eliminated the carbon footprint of the house.
However, the house has baseboard electric heat. It was using so much electricity that it required two 200-amp breaker boxes – one for the electric baseboard heaters and a second one for everything else.
When my wife Lonnie and I realized that our daughter’s dream house was an energy hog, we set to work making changes to make it more energy-efficient, and reduce monthly electric bills that could have exceeded $1,000 in winter. We succeeded in reducing the electricity consumption of the house by more than half, as shown in graph at the bottom of this post.
We clearly labeled all the circuit breakers, which helped us gain a better understanding of what was using the most electricity in the house. The old electric baseboard heaters were the major issue, but the water heater, the clothes dryer and the well pump were also heavy users of electricity. Clear labels on the circuits also helped us communicate with electricians and other contractors.

When Zahava bought the house, the old refrigerator in the kitchen didn’t have a freezer, so there was a second old refrigerator with a freezer in the basement. That was both inconvenient and wasteful of energy. We replaced the two old, inefficient refrigerators with one new, energy-efficient refrigerator. That cut the electricity used for refrigeration by at least half.
Next, we replaced the old laundry. We got an LG ventless heat pump dryer, which runs about 35ºF cooler than a typical dryer and does not blow heat out a vent to the outdoors. It uses about 1/3 as much energy as a conventional clothes dryer. The heat pump dryer dries the clothes by dehumidification rather than heat.

Note the capped vent above the dryer in the photo. Rather than going outside via a vent as heated water vapor, water extracted from damp clothes goes down the same drain that the washing machine uses. Only about 2% of U.S. homes have ventless heat pump dryers, but they are popular in Europe.
The walk-out basement studio had twelve 4-foot fluorescent light bulbs. We hired an electrician to remove the ballasts and replace the fluorescent bulbs with LED bulbs that use half as much electricity. LED lights are bright, turn on instantly and last at least 10 years.

Replace fluorescent lights in the studio with LEDs
We replaced the old 80-gallon water heater with a new 50-gallon heat pump water heater that uses much less electricity. The new water heater extracts heat from the ambient air and transfers it to the water in the tank. Warm air from the adjacent studio enters the utility closet through a vent near the air intake of the water heater, and then the chilled exhaust air from the heat pump water heater goes back into the studio via a duct. In summer, the chilled exhaust air keeps the studio cool.
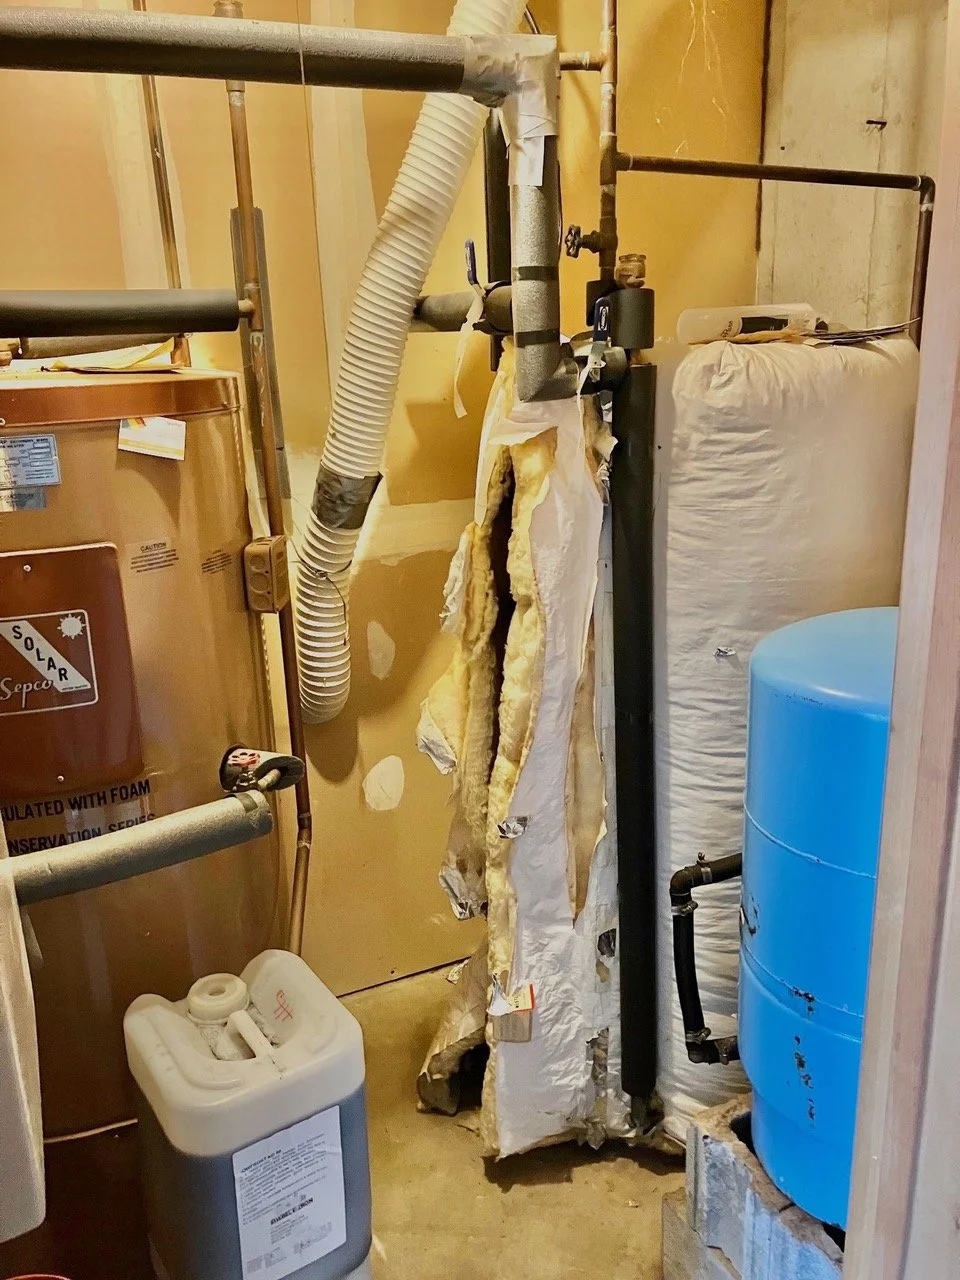
Old water heater
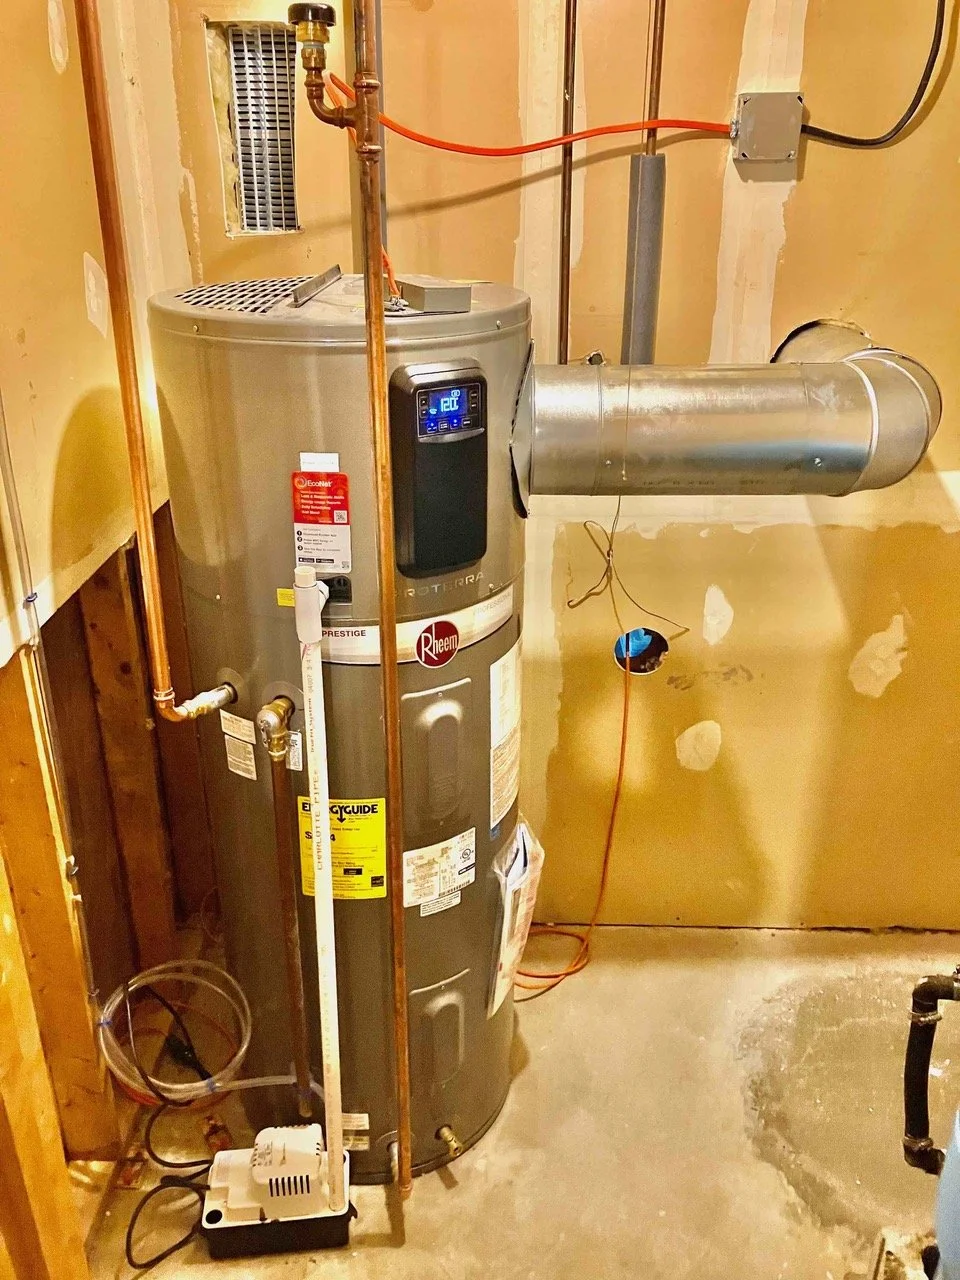
Heat pump water heater
Zahava is a potter, so we installed an electric kiln in the studio. To save energy, we opted for 3” insulatioon in the kiln walls instead of the standard 2.5”. We were pleasantly surprised to find that firing the kiln to over 2,000º for 10 hours only uses less than $20 worth of electricity.
She only fires the kiln about six or eight times a year. When she does, she turns up the thermostat on the heat pump water heater to capture some of the heat thrown off by the kiln and store it in the water heater.
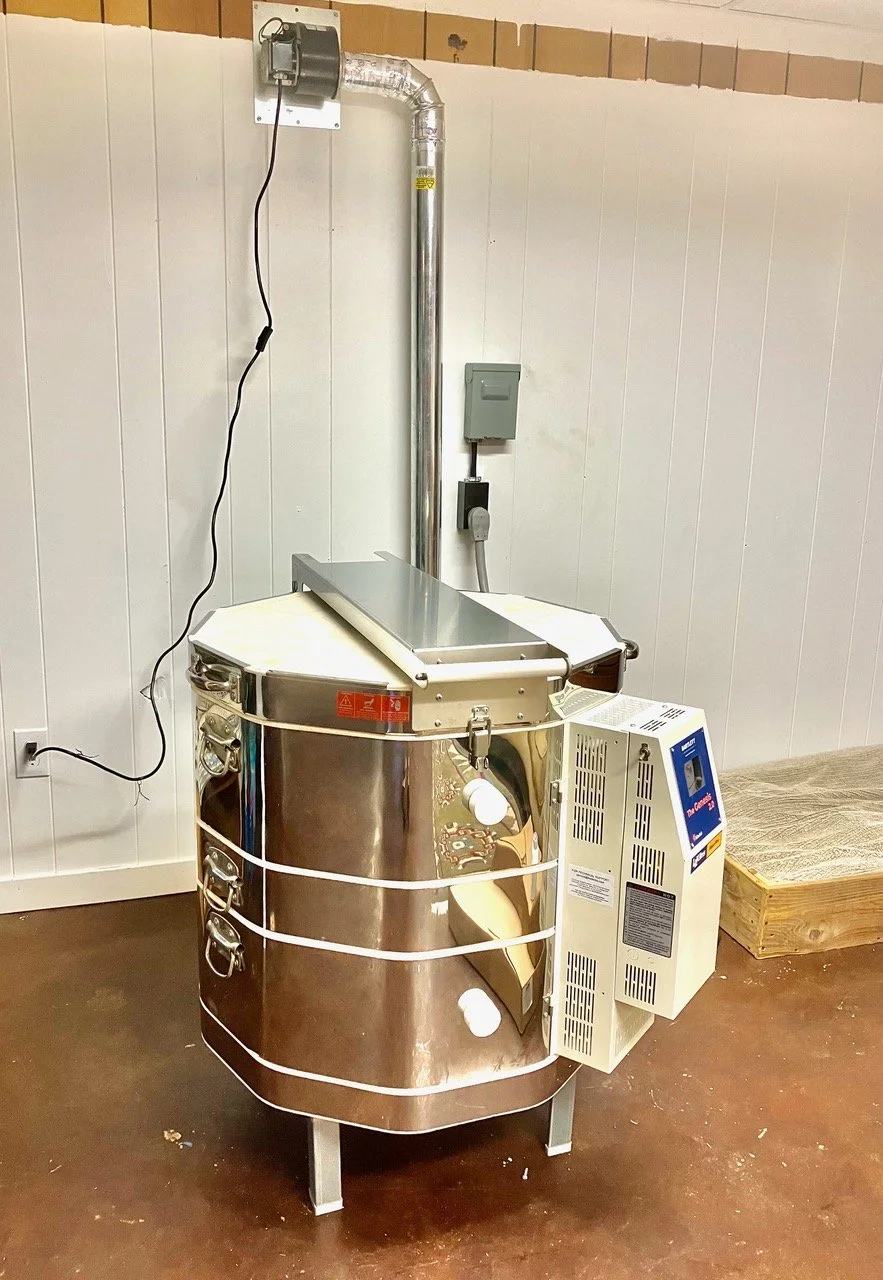
New kiln and vent

Zahava and a ceramic creation
The house has twenty-eight 50-year-old windows, which results in heat loss. We got an esQmate to replace all the old windows with new, better-insulated windows. The price of $34,000 was a non-starter.

So we figured out a way to install inner storm windows made of 1/4” plexiglass, which is one-fifth as heat-conductive as glass and adds another insulating layer of dead air in the windows. Rather than hiring a handyman, Lonnie and I installed them ourselves, a few at a time, over the summer.
The cost of the materials and tools for all 28 inner storm windows was approximately $3,000. It took us an average of two to three hours to install each window.
First, we attached a frame made of vinyl to the window using screws. Then we affixed a ½” wide strip of self-adhesive white felt weather stripping to the vinyl frame. Then we screwed the clear plexiglass to the vinyl frame, sandwiching the white felt weather stripping between the vinyl frame and the plexiglass.
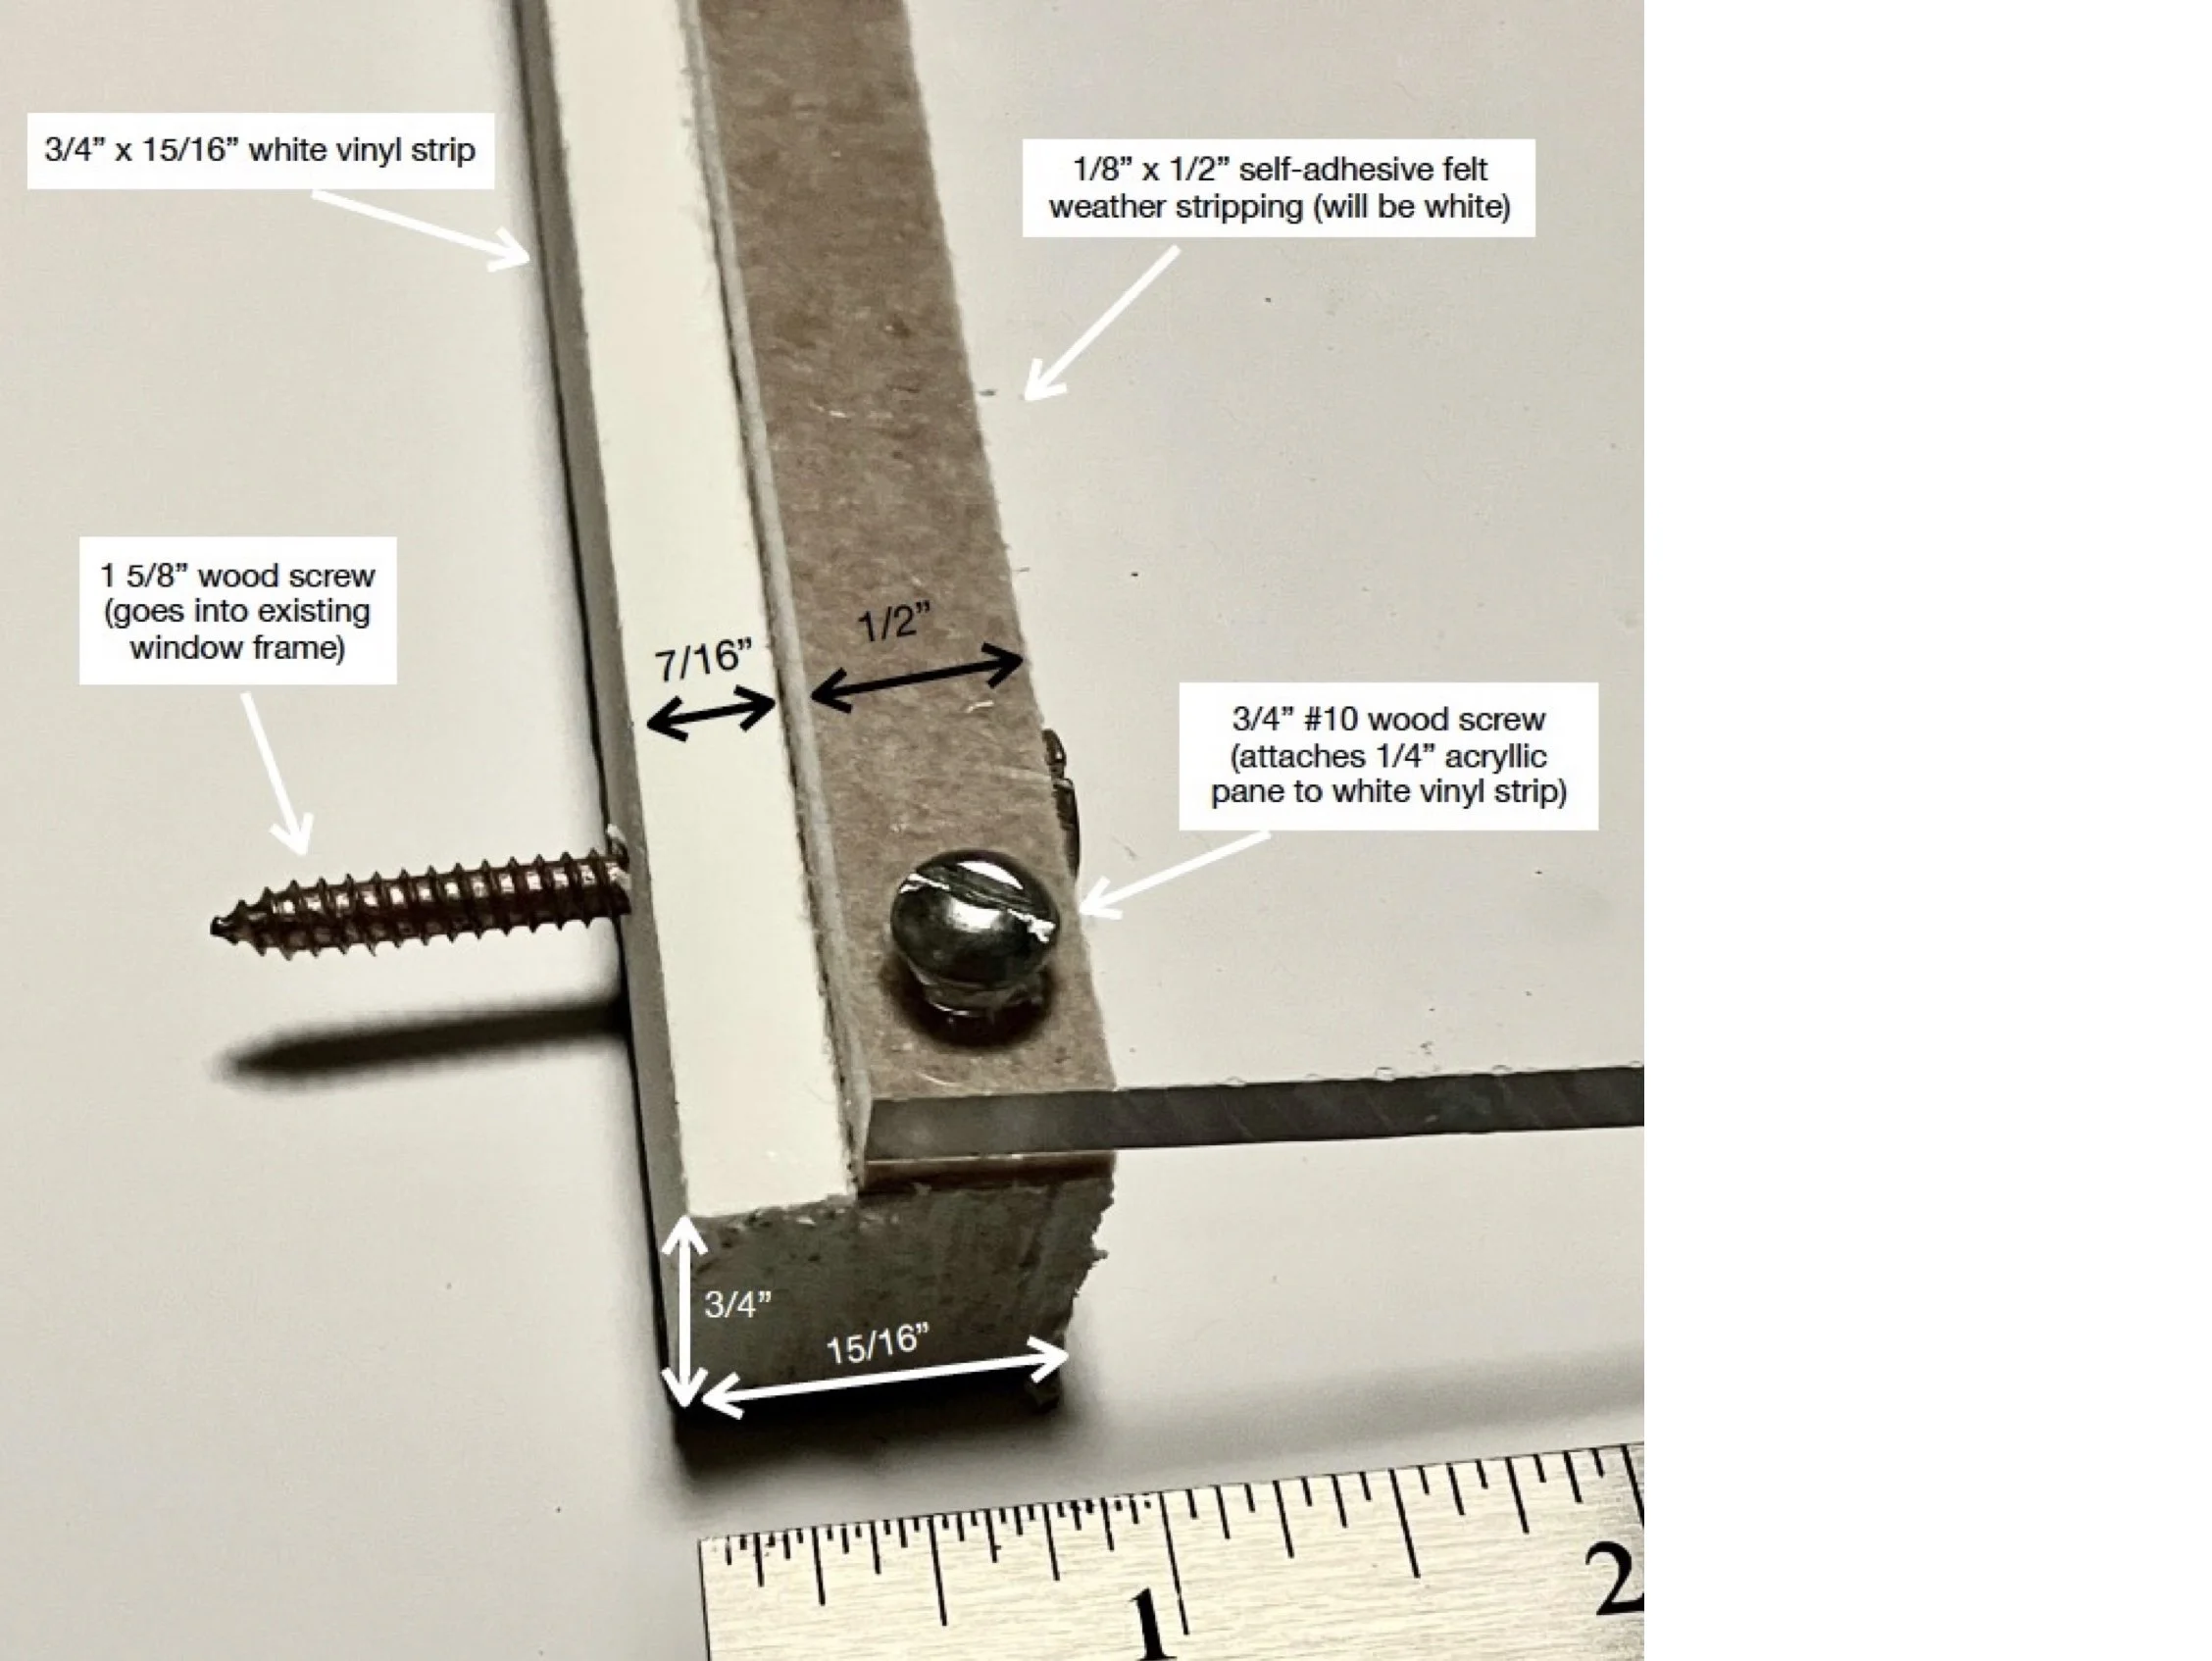
We made the holes in the plexiglass slightly larger than the screw shaftss, so that the plexiglass can expand and contract with changes in temperature. The inner storm windows are crystal clear and barely noticeable.
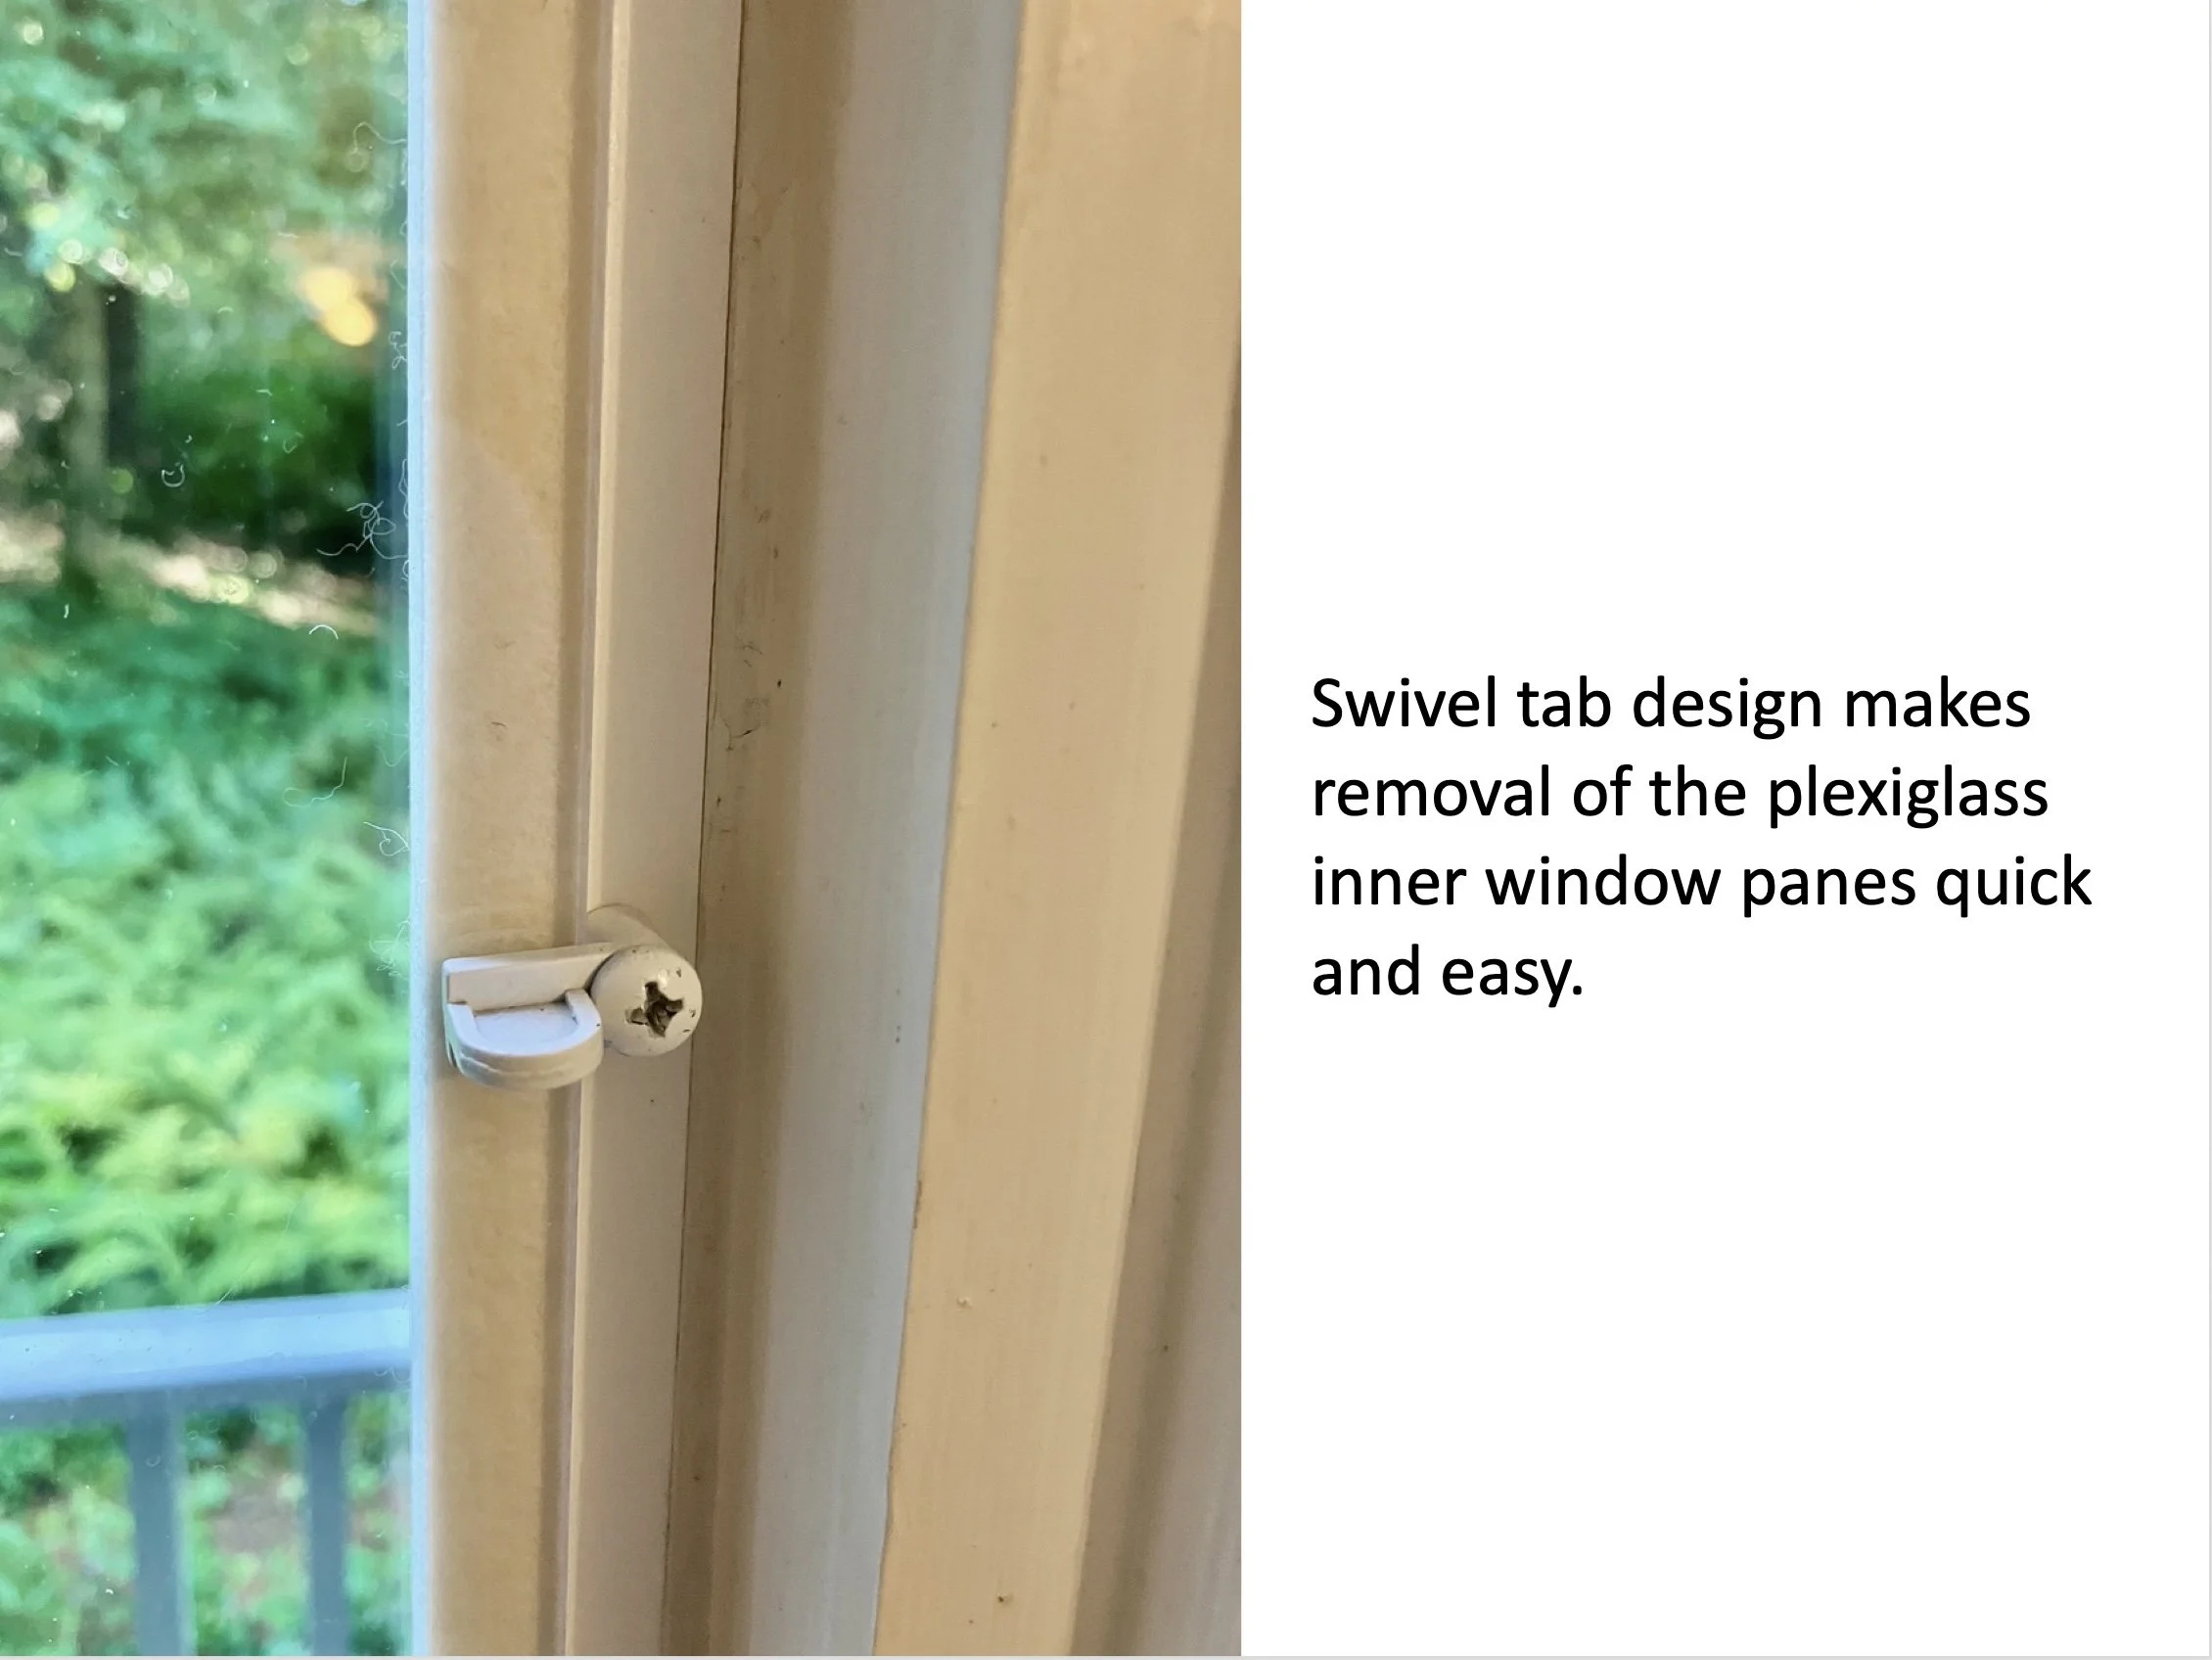
Halfway through the window project, we changed the design to facilitate quick removal of the plexiglass panes. We attached the plexiglass to the vinyl frames using swivel tabs instead of screws.
With the swivel tab design, one can easily remove the plexiglass in less than 30 seconds. 5/16” white swivel tabs can be purchased at Amazon.
The plexiglass inner storm windows reduce heat loss across the windows. We got an inexpensive ($15) infra-red thermometer andmeasured the temperature of the windows. The air temperature outdoors was 30º. The temperature indoors was 67º.
The surfaces of the walls were 64º. The surfaces of the plexiglass inner storm windows was 60º. We temporarily took the plexiglass off one of the windows, and measured the inside surface of the glass at 52º.

The inner storm windows are barely noticeable. (Note the baseboard electric heaters.)
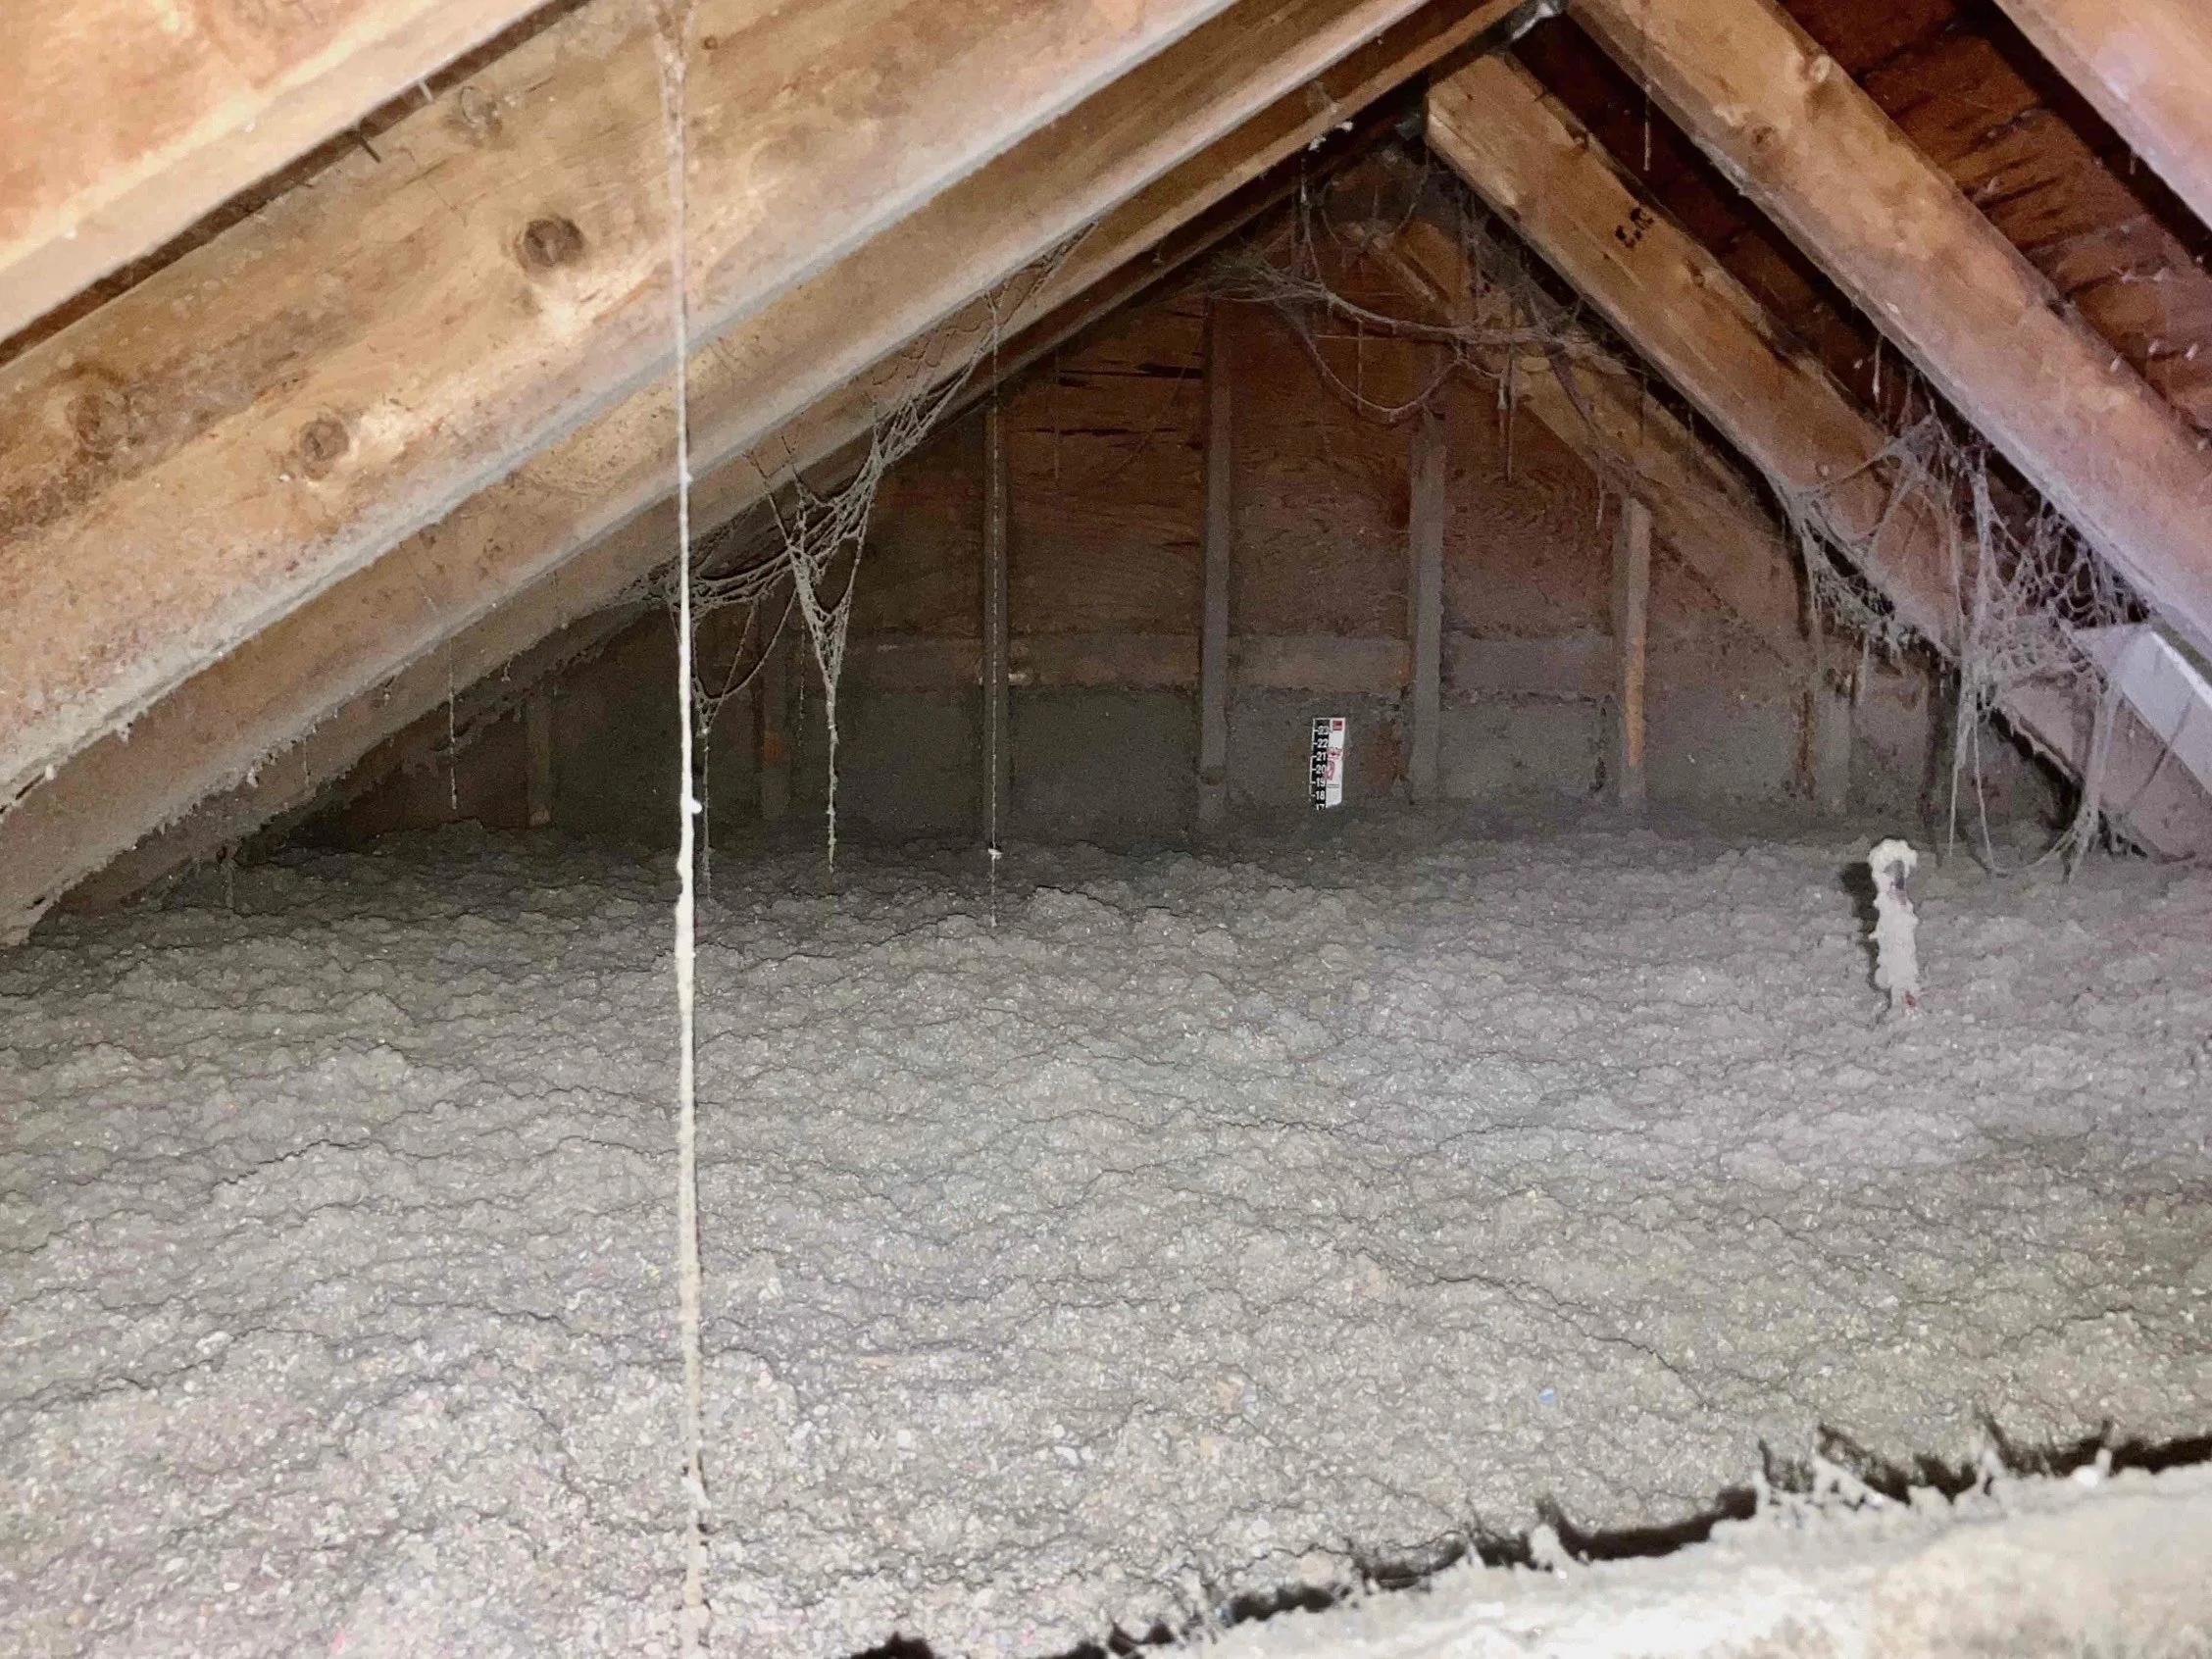
Attic insulation
We got a free energy assessment from Mass Save, which recommended more insulation and weather stripping. We hired a company to add cellulose insulation in the attic and weather stripping on the doors. Mass Save paid more than 75% of the cost. The cellulose insulation in the attic is now about 17” deep.
We also got cellulose injected above the garage ceiling. They had to drill these holes to inject the cellulose into the ceiling. When they were done, they plugged up the holes. Again, Mass Save paid over 75% of the cost. After smoothing over the holes in the ceiling with Spackle, Lonnie and I painted it. We applied spray foam insulation on the inside walls of the utility room to prevent heat loss to the garage
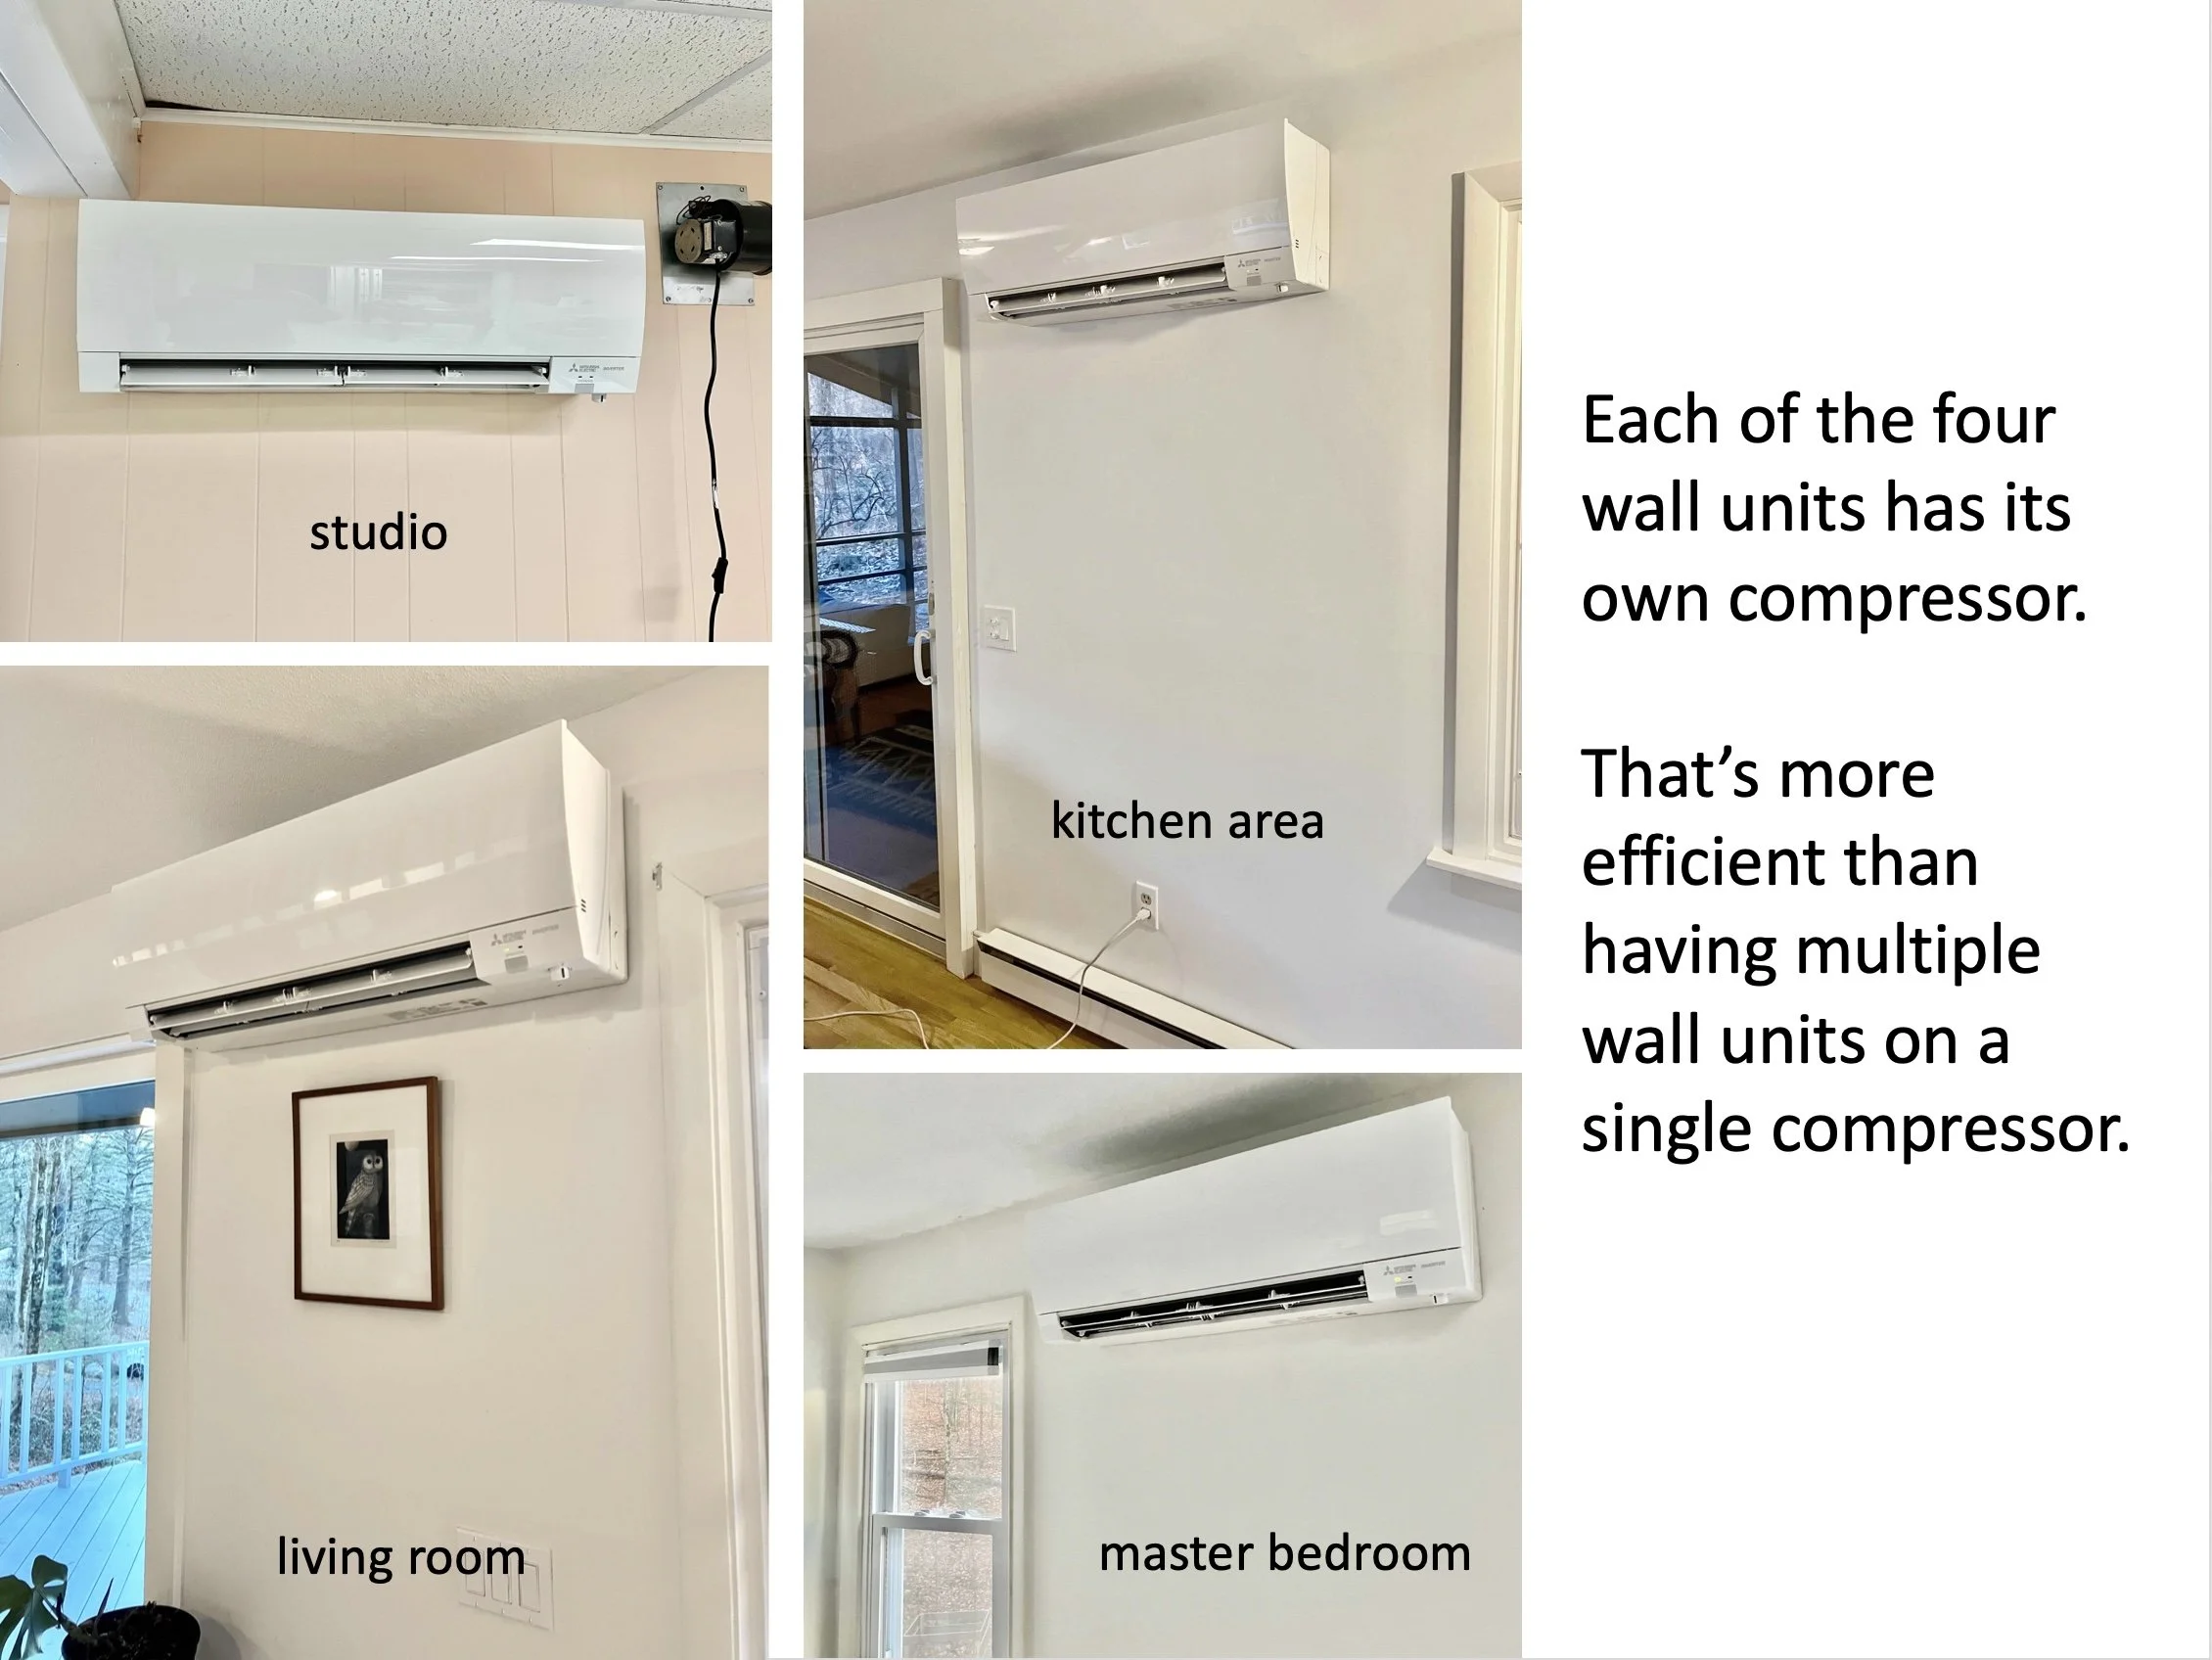
We got four heat pumps installed in August. Each one has a compressor outdoors and a wall unit indoors. Each has its own remote temperature control, so for example the master bedroom can be kept comfortable at night without using additional energy to heat or cool the rest of the house.
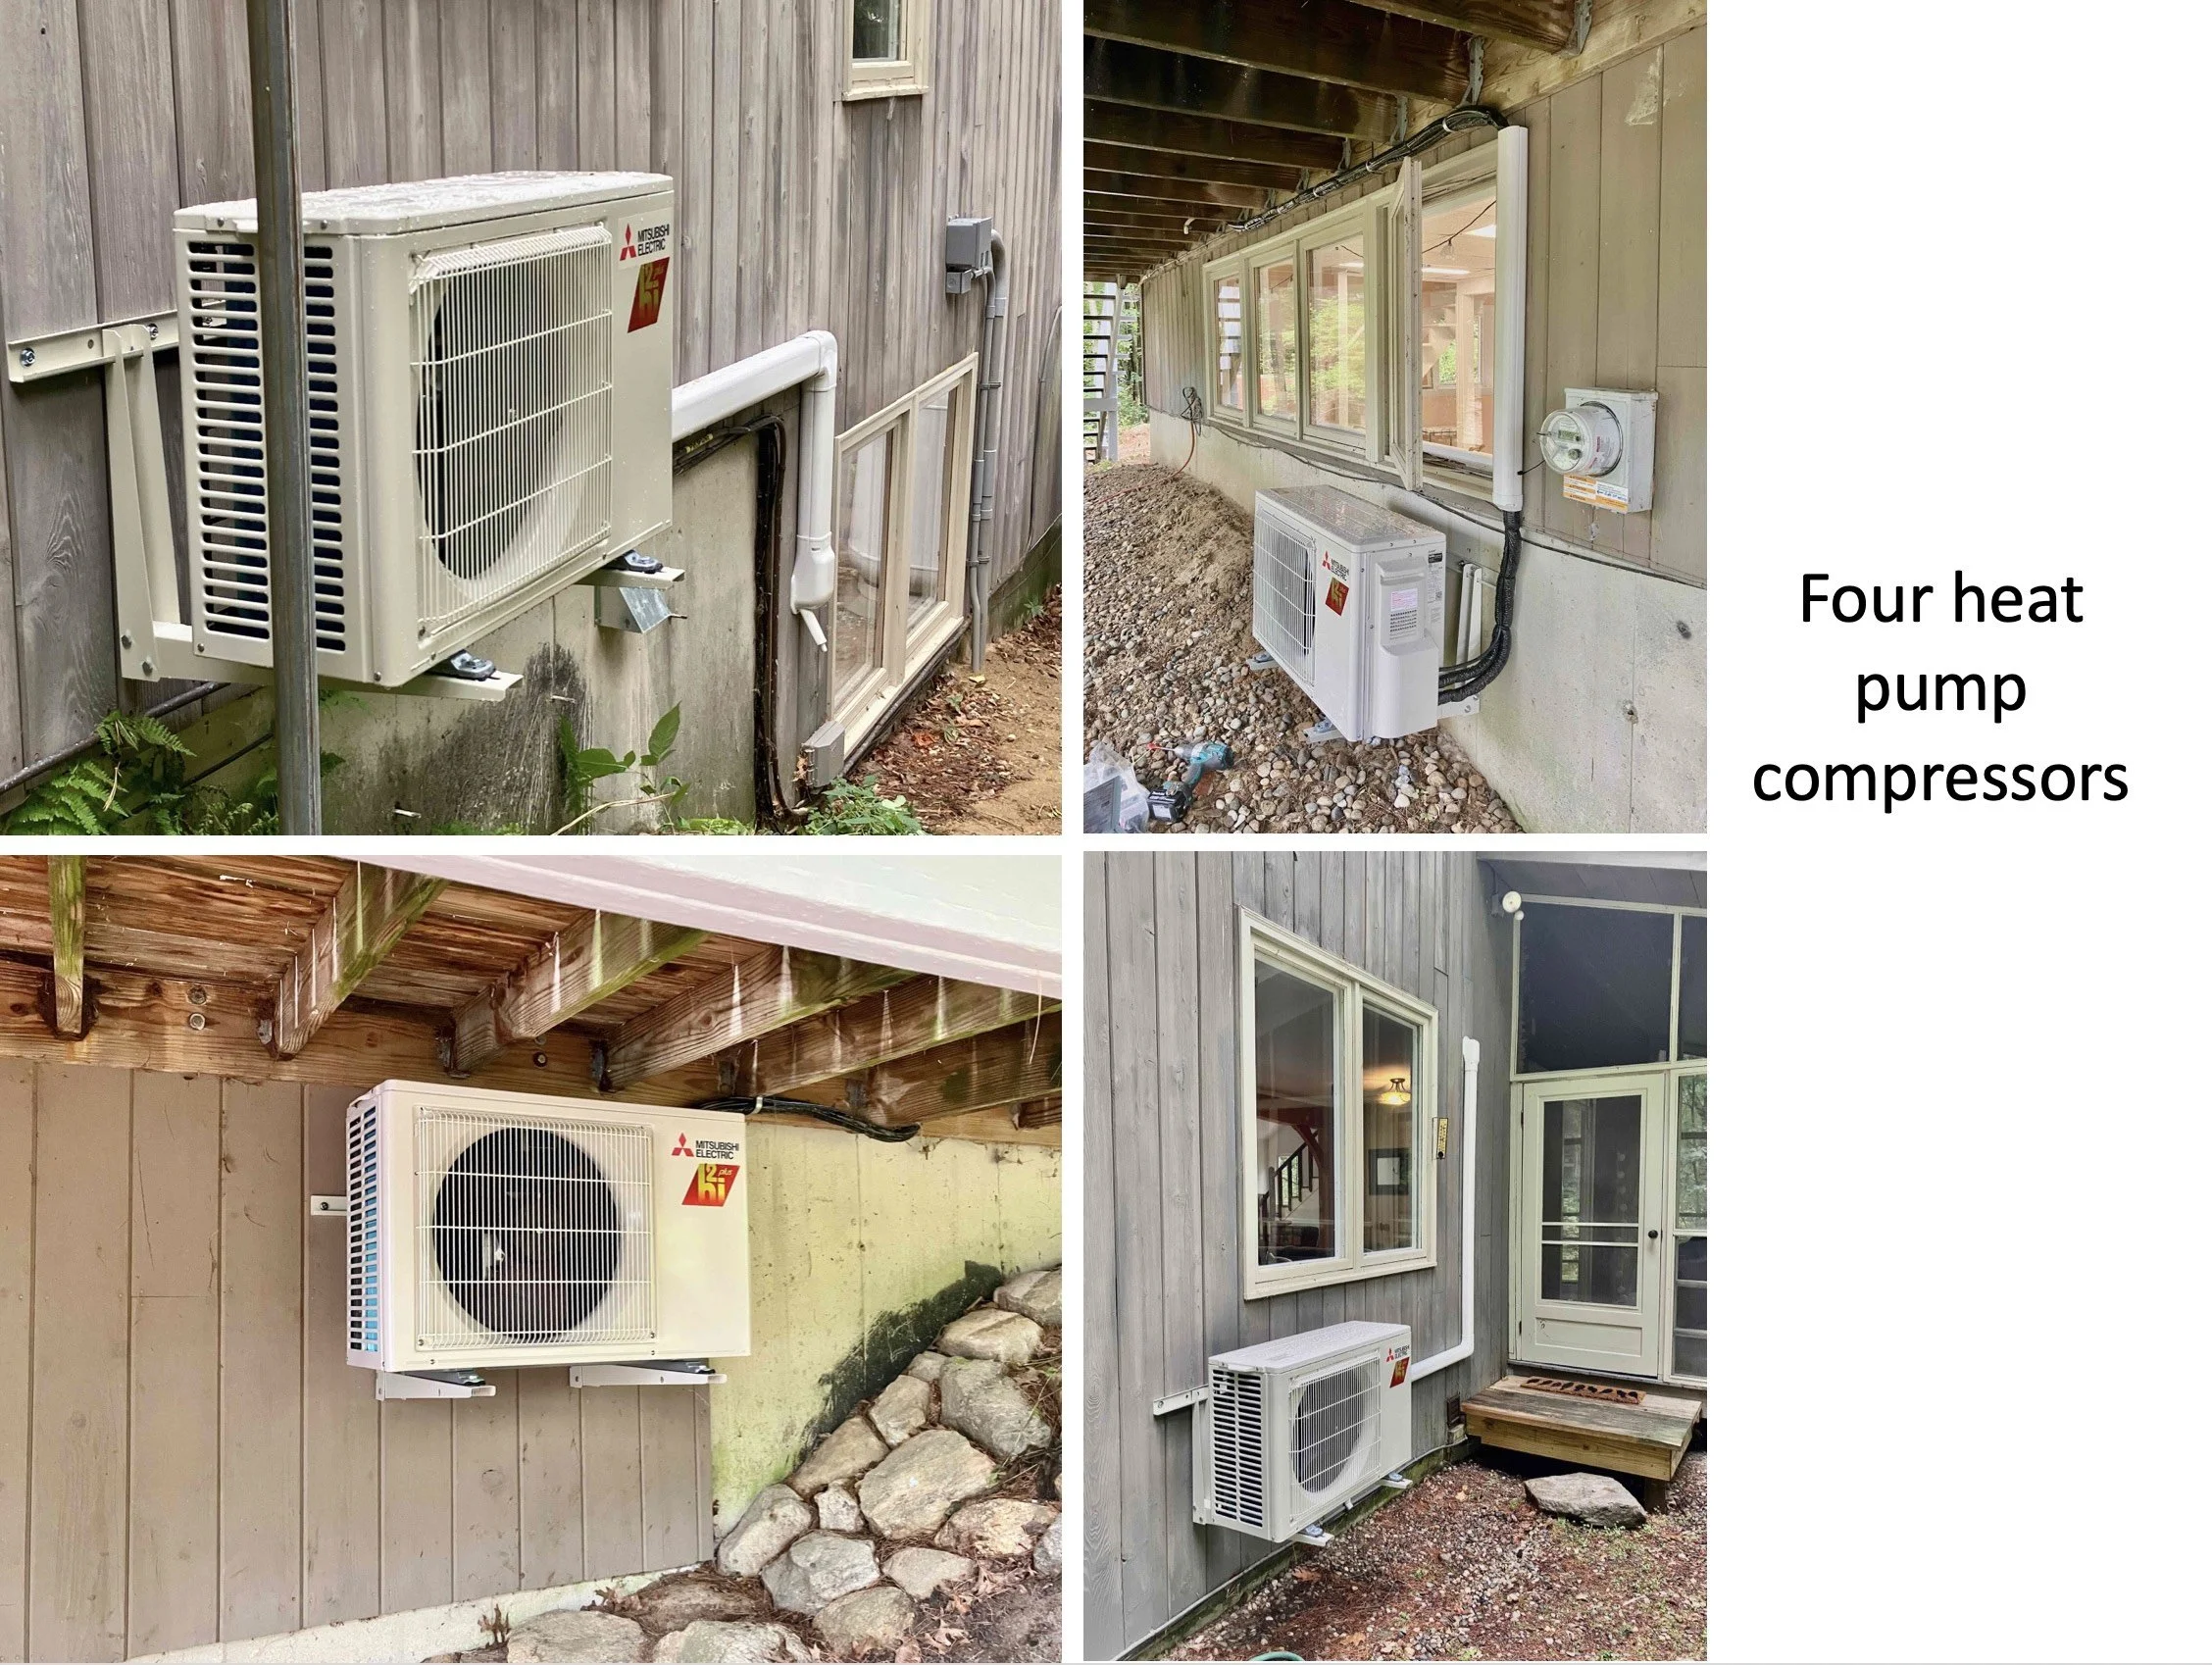
The four units combined can provide 45,000 BTUs. That is enough for the whole house, which has 2,200 square feet. When the temperature dropped to 14ºF below zero in February, the heat pumps kept the house comfortably warm. We kept the electric baseboard heaters in case of emergency.
We got six quotes ranging from $20,600 to $31,000. We chose the low bidder, who did a very good job for us. We got a $10,000 rebate from Mass Save, and we paid the $10,600 balance with a 7-year, zero-interest Mass Save HEAT loan through a local credit union. The average monthly savings on the electric bills are much more than the monthly loan payment of $126.
The heat pumps came with a 12-year warranty from the manufacturer. According to EnergySage, heat pumps typically last around 10 to 15 years, but some experts claim a well-maintained heat pump can last as long as 20 to 25 years – about a generation!
Each of the four heat pump compressors drives one wall unit, which is more energy-efficient than having multiple wall units driven by a single compressor.
The heat pump compressor and wall unit in the studio keep the studio warm, and also provide warm air for the heat pump water heater in the adjacent utility room.
The heat pumps were put to the test in early February when temperatures dropped to minus 14ºF. The house remained comfortably warm through the cold snap. Following is an excerpt from a February 8, 2023 Boston Globe article.
“As temperatures began to fall on Friday, the Globe asked heat pump users via Twitter and an online survey to report how their pumps performed as the worst of the cold hit. More than 450 responded, and most said their pumps kept their living spaces as warm as they wanted. That was particularly true in Massachusetts, where temperatures fell below zero but not to the extreme depths they hit farther north. And the best experiences were reported by people who had installed heat pumps intended for cold climates and whose homes were well-insulated.
In parts of New Hampshire and Maine, where temperatures plunged beyond 20 degrees below zero, a number of homeowners said their heat pumps couldn’t keep up, allowing indoor temperatures to fall into the low 60s or high 50s. Several who had that happen said their pumps were able to bring inside temperatures back up quickly after the sun rose and outside temperatures climbed back to 0 and above.”
We replaced the old well pump and motor, which were 50 years old. Instead of repeatedly turning on and off, the new well continuously provides constant water pressure, which conserves energy.
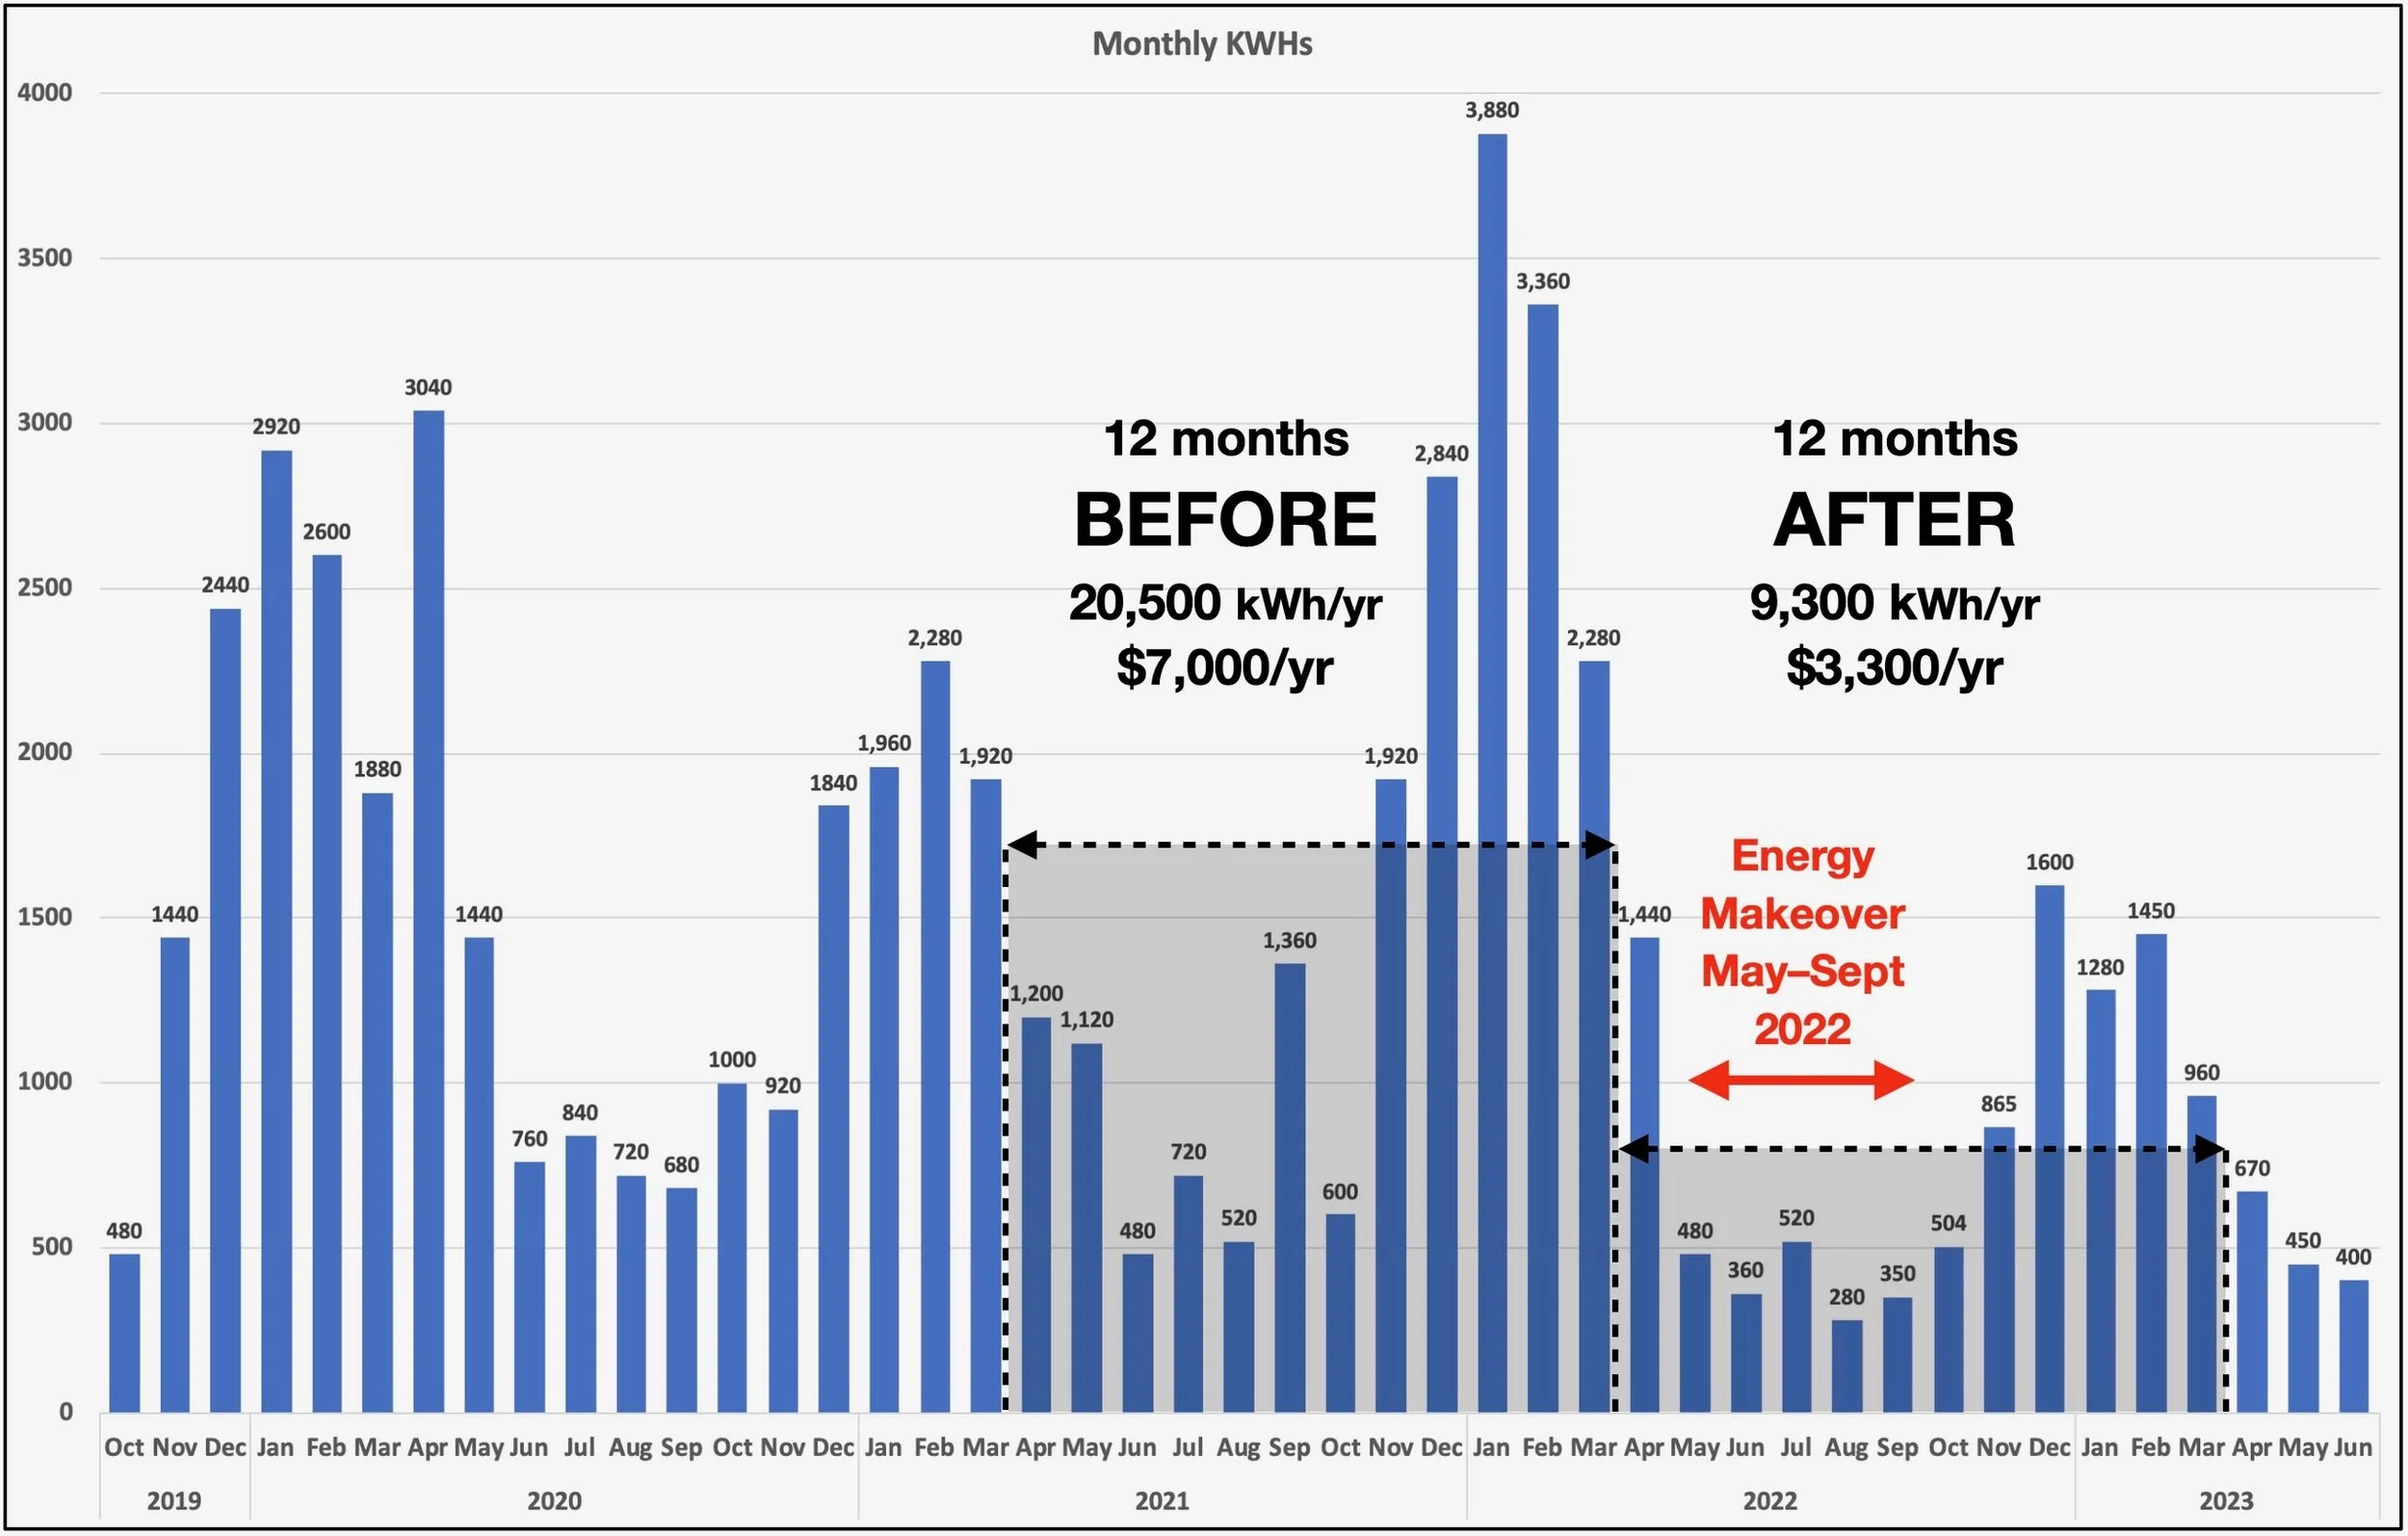
Zahava purchased the house on March 29, 2022.
Over the 12 months prior to purchasing the house, it used a total of 20,520 KWHs. Over the 12 months after purchasing of the house, it used a total of 9,320 KWHs – less than half as much.
This reduction in electricity usage is especially significant because electricity rates increased from 27.9¢ per KWH in December 2022 to 35.1¢ per KWH in January 2023.
At 35.1¢ per KWH, the reduction of 11,200 KWHs translates to an annual savings of $3,930. The total cost of all the energy saving improvements was approximately $28,000 after rebates. Annual savings of $3,930 represents approximately 14% return on investment.